Using Travis CI to deploy to Cloud Foundry
Table of contents
- Background
- Assumptions
- Scope
- Before deploy
- Deploy
- Env
- After deploy
- Deploys in practice
- Conclusion
- Other blue-green and zero-downtime scripts
Background
Many of our applications run their Continuous Integration builds via Travis CI. We recently configured Travis to deploy to our Cloud Foundry stack.
There’s an example repository that accompanies this post, and we’ll link to parts of it below, as we demonstrate the steps that we found useful.
Assumptions
This post assumes that you’re somewhat familiar with:
Scope
If you’re trying to do something similar, you might like to know that this example covers;
-
multi-tier deploys from Travis to Cloud Foundry (i.e. deploys to more than one Cloud Foundry
space) -
continuous deploys from Travis to Cloud Foundry after a successful CI build
-
managed deploys from Travis to Cloud Foundry upon the push of a given tag to the master branch of your app’s repo, (we’re using Git and Github in this example)
-
the Travis
scriptprovider rather than the Traviscloudfoundryprovider (to afford a bit more control over smoke testing, etc) -
blue-green-style deploys. I say ‘style’ because we don’t go ‘whole hog’ and handle error-handling and idempotency here, although you could, and there are various blue-green and zero-downtime scripts out there
Although we don’t cover this topic here, you might also be interested in Travis CI’s ‘Build Stages’ beta. This introduces more of a ‘pipeline-style’ build-and-deploy process, allowing selected build processes to run in parallel, while also allowing selected build stages (groups of processes) to run conditionally, based on a previous stage passing, for example.
Before deploy
Before we move into deeper waters, let’s take a quick look at the before_deploy: block of our .travis.yml.
You can configure this build stage to execute any pre-deploy tasks you like. As explained in the Travis docs “A non-zero exit code in this stage will mark the build as errored”.
before_deploy:
- find . -type f -perm 0444
- export CF_TRACE=true-
Our instance of Cloud Foundry’s Diego runtime was objecting to the transfer of files with insufficient permissions for its requirements, in this case
dr--r--r--(Linux file permissions). So we took the opportunity to hunt them down here. You probably won’t need to do this. -
We also wanted to see more verbose debug output from Cloud Foundry during the deploy, so we exported
CF_TRACE=true.
Deploy
The deploy: block of our .travis.yml takes us to the heart of matters.
Travis provides comprehensive documentation on this build stage, but I’ll demonstrate our particular findings.
Here is a Tapir to calm your nerves:

deploy:
  # 1. TO STAGING SPACE (continuously deploy here):
  - provider: script
    skip_cleanup: true
    script: env CF_SPACE=staging CF_APP_NAME=test-app CF_MANIFEST=manifest-staging.yml ci/deploy_to_cf.sh
    on:
      repo: JasmoMyer/travis_to_cloudfoundry
  # 2. TO LIVE SPACE (when a 'live-deploy*' tag is pushed to master):
  - provider: script
    skip_cleanup: true
    script: env CF_SPACE=live CF_APP_NAME=test-app CF_MANIFEST=manifest-live.yml ci/deploy_to_cf.sh
    on:
      repo: JasmoMyer/travis_to_cloudfoundry
tags: true-
It’s a multi-tier deploy: We’ve harnessed Travis to deploy to both our
stagingandliveCloud Foundry spaces. -
It’s a conditional deploy: Due to the deploy conditions applied via
on:, we’ll be deploying continuously tostaging, after a successful CI build on themasterbranch (for example, after a Pull Request is approved and merged intomaster). And we’ll be deploying toliveonly upon pushing alive-deploy*tag to themasterbranch. The pattern-matching for the branch and tag conditions of the deploy, is actually handled further up in our.travis.ymlunder thebranches:block. -
We’re using Travis CI’s
scriptprovider: We could have made use of Travis CI’scloudfoundryprovider, but we ended up using thescriptprovider instead, because we wanted to facilitate a blue-green-style deploy with smoke testing. There are many other blue-green and zero-downtime scripts out there, that you might want to make use of. We spun our own, and it has its flaws, but it may give you some hints. -
We’re skipping cleanup: It’s potentially more economical to allow Travis to skip cleanup before deploying to Cloud Foundry. This means that the working directory state that results from Travis’s prior build stages (e.g.
install:orscript:), is not reset back to its original condition. This can be useful if your earlier stages produce any resources that you’d like to deploy. Our Front End applications in particular, make use of this option, since their builds often produce required static resources like JavaScript and image files. In terms of filtering out any resources that you don’t wish to deploy, you can make use of Cloud Foundry’s.cfignorecapability.
Env
To support the script provider deploy configured above, we need to give Travis some ENV vars. This is because our deploy script makes use of these variables when calling our Cloud Foundry API endpoint.
env:
  global:
    - CF_API= # your Cloud Foundry API endpoint
    - CF_ORGANIZATION= # your Cloud Foundry organization name
    - CF_USERNAME= # your Cloud Foundry user name
- secure: # your Cloud Foundry password, encrypted- Travis provides docs on how to encrypt any sensitive data, like your Cloud Foundry password, for example.
After deploy
Finally, a quick look at the after_deploy: block of our .travis.yml.
after_deploy:
  # - It's possible to run smoke tests during the blue-green deploy (see comment in ci/zero_downtime.rb).
  # - Smoke tests could also be run here to verify all is well post-deploy.
# - You may also want to configure a deploy notification.-
You’ve hopefully run your smoke tests during your blue-green-style deploy, but in any case, you can also now run them here, to verify that the app is working post-deploy.
-
You may also want to configure this block to send a deploy notification to a Slack / message-service channel of your choice.
Deploys in practice
1. Pull Request builds
Rest assured that Travis’s deploy: stage does not execute for Github Pull Request builds. So you’re not in danger of deploying any pre-approved code.
If you’ve integrated your repo with the Travis Service Hook, when you raise a Pull Request, you’ll see the Travis CI build kicking off in the Pull Request’s ‘Conversation’ pane. Following the log of that build, you’ll see the following output near the end:
Skipping a deployment with the script provider because the current build is a pull request.
Skipping a deployment with the script provider because the current build is a pull request.- This assures you that neither the Staging nor Live deploy have happened. It would be nice to do a bit of work to get Travis to print out a little more detail about the particular deployment that was skipped. For example, each
scriptdeploy could be given aname:field to uniquely identify it, and this name could be referenced in the build output.
2. A note on working with the commit-to-trunk flow
If you use the commit-to-trunk version control model, the Pull Request stage noted above doesn’t apply. But all is well, since your code will already be approved before it gets committed to your master branch (or whatever you’ve named your ‘trunk’). Once it’s in master, it can be deployed continuously by Travis to any Cloud Foundry space you’ve configured. So there is flexbility when it comes to working with different version control flows.
3. Deploying to Staging
As mentioned above, committing to master (or merging commits into master from an approved Pull Request) will result in Travis performing a deploy to our staging Cloud Foundry space, due to the way in which we’ve set up our deploy configuration and deploy script.
Checking the log of the Travis build, you’ll see the following output near the end:
Installing deploy dependencies
Preparing deploy
Deploying application
... ELIDED ...
Skipping a deployment with the script provider because this is not a tagged commit.-
This assures you that the deploy to Staging did happen, and that the deploy to Live didn’t happen because the necessary deploy conditions were not met (in this case the presence of the
live-deploy*tag). -
Of course, you can be alerted to your app’s current deploy status, via any deploy notifications you’ve configured in your
after_deploy:block. -
As discussed briefly above, you could also configure a more ‘pipeline’-like build via Travis’s ‘Build Stages’ beta. This could afford a better visual representation of the current deploy status, in your build history.
4. Deploying to Live
In order to deploy live, simply checkout the code you wish to deploy, tag it according to the pattern you’ve specified, and push your tag (in our case live-deploy*) to master.
The advantage of this method is that you leave a nice deploy history behind you, and you’ve got the opportunity to use annotated tags to provide even more context if required. You could also reference your app’s version number in the live deploy tag.
This time towards the end of the Travis build logs you’ll see:
Skipping a deployment with the script provider because this branch is not permitted
Installing deploy dependencies
Preparing deploy
Deploying application
... ELIDED ...-
This assures you that the deploy to Staging didn’t happen, due to the presence of the deploy tag, and that the deploy to Live did happen.
-
Of course, you can be alerted to your app’s current deploy status, via any deploy notifications you’ve configured in your
after_deploy:block. -
As discussed briefly above, you could also configure a more ‘pipeline’-like build via Travis’s ‘Build Stages’ beta. This could afford a better visual representation of the current deploy status, in your build history.
5. Rolling back
Travis keeps a lovely-looking and browsable history of all your builds, including Pull Request Builds, merges to master and tagged builds. This makes it very easy to re-run a given build.
Once you’ve navigated to the build in qustion, you’ll see a ‘Restart build’ button towards the top-right of the page.
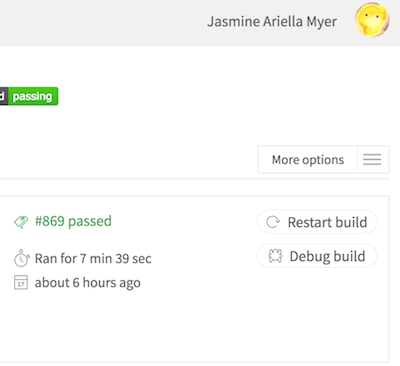
This is one approach you could use if you need to re-run a failed build, or rollback to a previously-deployed version.
6. Particulars
Of course, the particulars of your own configuration will determine the feedback you get from Travis. But hopefully you’ve gained some handy hints.
It’s also worth noting that, while this blog post looks a bit long (sorry!), with this relatively simple configuration up and running, we’ve actually experienced one of the most quick and smooth build-and-deploy processes of our time.
Conclusion
We’ve taken a look at the key Travis configuration that enables us to deploy to Cloud Foundry, which lives under the following blocks of our .travis.yml;
before_deploydeployenvandafter_deploy
We saw how to make use of Travis’s script deploy provider, in order to engineer a blue-green-style deploy, and to enable us to run our smoke tests prior to switching traffic to the newly-deployed app.
We had a look at how deploys work in practice, given the different conditions that apply for each of our production tiers. We’ve seen that we can harness Travis to deploy continuously, and / or in a managed fashion.
The approach is flexible enough that it works for different version control models, including branch-based and trunk-based development.
We also saw that Tapirs can have a calming effect on the nerves.
Good day to you!
Other blue-green and zero-downtime scripts
Find this post useful, or want to discuss some of the topics?